

Clicking on the image will enlarge to full view.
Supplies
1 tube of choice - I’m using the artwork of Elias Chatzoudis which you can purchase here
Font of Choice - I’m using Yiggivoo Unicode here
Weescotlass Mask 167 here
“Vanilla” a taggers scrap kit created by Tina of Tina’s Magical Scrap World and can be purchased here. You can visit her blog here.
Thank you, Tina for such a beautiful scrap kit!
~♥~ Let’s get started ~♥~
Open a blank canvas 750 X 700.
Flood fill white.
Copy and paste Bow Heart Frame 1 as a new layer.
Resize 50%.
Free rotate left 15 degrees.
Move to the left side of your canvas.Duplicate/Mirror.
Copy and paste Bow Heart Frame 2 as a new layer.
Resize 50% and position inbetween the other 2 hearts.
Use your Magic Wand and click inside of each frame.
Selections/Modify/Expand by 6.
Copy and paste a paper of choice as a new layer.
Selections/Invert.Hit the delete key.
Close out your white canvas.
Merge visible.
Re-open your canvas.
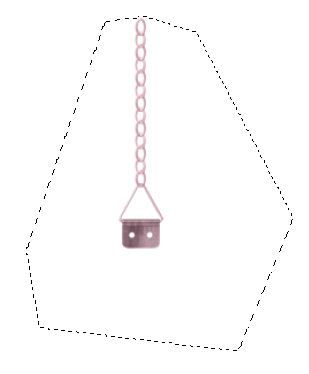
Copy and paste Frame Hanger 1 as a new layer.
Resize 40%.
Using your Freehand Selection tool draw around the framehanger.
Selections/Modify/Feather
Number of Pixels: 20
Tap the delete key twice.
Deselect.
Free rotate right 15 degrees.
Move into position on the left side.
Duplcate/Mirror
Add your embellishments:
Organza Flowers 1 & 2: Resize 25%.
Butterflies 1 & 2: Resize 25% and 60%
Flower String: Free rotate left 60 degrees
Highlight your white canvas.
New Raster layer.
Select All.
Copy and paste a paper of choice Into Selection.
Deselect.
Apply the mask.
Merge Group.
Move slightly to the left of your canvas.
Repeat the above step accept use another paper of a different color.Mirror.
Move slightly to the right of your canvas.
Merge down.
Flip.
Type out the words
LOVE WAITS FOR ONE THING…
THE RIGHT MOMENT
Or whatever words you like.
I added a slight inner bevel:
Bevel: 2
Width: 20
Smoothness: 17
Depth: 3
Ambience: 0
Shininess: 14
Color: white
Angle: 248
Intensity: 28
Elevation: 63
OK
Add your copyrights.
Add your name, giving it the same inner bevel.
Resize all layers 80%.
I hope you enjoyed this tutorial.
I’d love to see your results.
Email me!
Hugs,
Bev
Supplies
1 tube of choice - I’m using the artwork of Elias Chatzoudis which you can purchase here
Font of Choice - I’m using Yiggivoo Unicode here
Weescotlass Mask 167 here
“Vanilla” a taggers scrap kit created by Tina of Tina’s Magical Scrap World and can be purchased here. You can visit her blog here.
Thank you, Tina for such a beautiful scrap kit!
~♥~ Let’s get started ~♥~
Open a blank canvas 750 X 700.
Flood fill white.
Copy and paste Bow Heart Frame 1 as a new layer.
Resize 50%.
Free rotate left 15 degrees.
Move to the left side of your canvas.Duplicate/Mirror.
Copy and paste Bow Heart Frame 2 as a new layer.
Resize 50% and position inbetween the other 2 hearts.
Use your Magic Wand and click inside of each frame.
Selections/Modify/Expand by 6.
Copy and paste a paper of choice as a new layer.
Selections/Invert.Hit the delete key.
Close out your white canvas.
Merge visible.
Re-open your canvas.
Copy and paste Frame Hanger 1 as a new layer.
Resize 40%.
Using your Freehand Selection tool draw around the framehanger.
Selections/Modify/Feather
Number of Pixels: 20
Tap the delete key twice.
Deselect.
Free rotate right 15 degrees.
Move into position on the left side.
Duplcate/Mirror
Add your embellishments:
Organza Flowers 1 & 2: Resize 25%.
Butterflies 1 & 2: Resize 25% and 60%
Flower String: Free rotate left 60 degrees
Highlight your white canvas.
New Raster layer.
Select All.
Copy and paste a paper of choice Into Selection.
Deselect.
Apply the mask.
Merge Group.
Move slightly to the left of your canvas.
Repeat the above step accept use another paper of a different color.Mirror.
Move slightly to the right of your canvas.
Merge down.
Flip.
Type out the words
LOVE WAITS FOR ONE THING…
THE RIGHT MOMENT
Or whatever words you like.
I added a slight inner bevel:
Bevel: 2
Width: 20
Smoothness: 17
Depth: 3
Ambience: 0
Shininess: 14
Color: white
Angle: 248
Intensity: 28
Elevation: 63
OK
Add your copyrights.
Add your name, giving it the same inner bevel.
Resize all layers 80%.
I hope you enjoyed this tutorial.
I’d love to see your results.
Email me!
Hugs,
Bev
No comments:
Post a Comment