
 Clicking on the image will enlarge to full view
and show the animation.
Supplies
2 tubes of choice - I’m using the artwork of PinUpToons which you can purchase here
Font of Choice - I’m using Annabelle here
Becky Mask here
DSB Flux - Bright Noise
Animation Shop
“Dreams Take Flight” is a PTU tagger size scrap kit created by Nikki of Creative Intentionz. You can find it at Paradise4Scrappers. You can visit her blog here.
Thank you Nikki for such a dreamy kit!
This tutorial was written assuming you have a working knowledge of PSP.
~♥~ Let’s get started ~♥~
Open up a transparent 700 X 700 canvas.
Flood Fill white.
Copy and paste Frame 1 as a new layer.
Free rotate left 90 degrees.
Resize 60%
Duplicate
Move each frame into position.
See mine for reference.
Merge Down.
Use your Magic Wand and click inside of each frame.
Selections/Modify/Expand by 4
Selections/Invert
Copy and Paste a paper of choice below the frames.
Tap the delete key.
Deselect.
Copy and paste Curtain 2 as a new layer.
Resize 60%
Place in each window.
See my tag for reference.
Copy and paste your tubes as new layers in each frame.
Copy and Paste Berry Branch 3 as a new layer.
Resize 50%
Place at the corner of one of the frames.
Duplicate and put it at the corner of the other frame.
Copy and paste Butterfly 3 as a new layer.
Resize 35%
Free rotate Right 25 degrees.
Place over the Berry Branch.
Duplicate and place over the other berry branch.
Highlight your white canvas.
New Raster layer.
Copy and paste a paper of choice Into Selection.
Deselect.
Apply the mask.
Duplicate/Merge down.
Copy and paste Cloud 1 as a new layer just above the mask layer.
Lower the opacity to 53.
Copy and paste the Ladder as a new layer above the cloud.
Free rotate right 15 degrees
Lower the opacity to 24
Copy and paste the bed as a new layer just over the ladder.
Lower the opacity to 24
Select All/Float//Defloat
Highlight the ladder in your layers pallet and using your eraser, erase the parts of the ladder that you can see on the bed.
Deselect.
Copy and paste Sheep 1 as a new layer over the bed layer.
Image/Mirror
Resize 60%
Lower the opacity to 24
Select All/Float/Defloat
Highlight the bed layer and using your eraser tool, erase the part of the bed that’s covering the sheep.
Deselect.
Copy and paste the Moon as a new layer.
Image/Mirror
Resize 70%
Copy and paste Frog 2 as a new layer.
Image/Resize
Resize 40%
Open up the cluster of stars.
Using your Selection Tool choose stars to place on your tag wherever you like…resizing as you like.
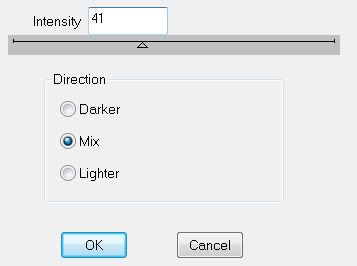
I’ve added DSB Flux - Bright Noise to mine
Add your copyrights.
Add your name.
Duplicate twice for a total of 3 layers
Name them Name 1, 2, and 3.
Highlight Name 1 and apply the DSB Flux - same settings as before.
Highlight Name 2 and apply the DSB Flux accept his the mix button twice.
Repeat with Name 3 layer accept hit the mix button 3 times.
Close out Name 2 and Name 3 layers.
Resize all layers 85%.
Copy Merge
Time to Animate
Carry into Animation Shop
Edit/Paste/As New Animation
Back into PSP
Close out Name 1 and open up Name 2
Copy Merge
Carry Into AS
Edit/Paste/After Current Frame
Back into PSP
Close out Name 2 and open up Name 3
Copy Merge
Carry into AS
Edit/Paste/After Current Frame
View your animation.
If you’re happy then save.
I hope you enjoyed this tutorial.
I’d love to see your results and show it off in my Show Arena.
Email me!
Hugs,
Bev
No comments:
Post a Comment