

Clicking on the image will enlarge for bigger view.
Supplies
1 tube of choice - I’m using the artwork of Tom Fleming which you can purchase here.
Font of Choice - I’m using Dragonfly here.
Country Bug’s Template - “My Way is the Bad Way” - here.
“Autumn‘s Splendour” is a PTU tagger size scrap kit created by Julie of Bits ’n Bobs and can be purchased at AMI. You can visit her blog here.
Thank you Julie. I just adore this kit!
This tutorial was written assuming you have a working knowledge of PSP.
~♥~ Let’s get started ~♥~
Open up the template.
Shift + D.
Close out the original.
Resize all layers 110%
Delete the following layers:
Raster 2
My way is outline
My way is
The bad way outline
The bad way.
Highlight the Frayed layer.
Select All/Float/Defloat
New Raster Layer.
Copy and paste a paper Into Selection.
Deselect.
Delete template layer.
To make this easier and less complicated than it has to be, close out all layers. We’ll only open the layers that we’ll be working with.
Open up your white canvas, Gray Back, and Gray Frame.
Highlight Gray Back.
Select All/Float/Defloat
Copy and paste a paper of choice as a new layer.
Resize 65%.
Selections/Invert
Tap the delete key.
Deselect.
Delete the template layer.
Highlight the Gray Frame layer.
Select All/Float/Defloat
New Raster Layer.
Copy and Paste a paper of choice Into Selection.
Deselect.
Delete the template layer.
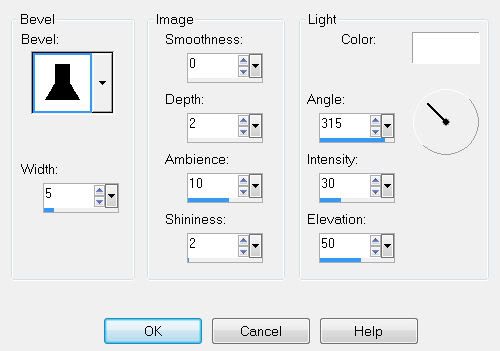
Give the frame a slight inner bevel:
Close out your white background.
Merge Visible.
Merge Visible.
Now close out that merged layer and rename it Main Frame.
Repeat the above steps with the remaining two Gray backs and frames.
Bring the Main Frame layer to the top of the other 2 merged layers.
After you’ve done that Merge Visible the following layers.
Small Gray, Small Gray 2, 3, and 4.
Select All/Float/Defloat
New Raster layer.
Copy and paste a paper of choice Into Selection.
Deselect.
Delete the template layer.
Close out all layers and merge visible the frames that goes to the squares.
New Raster layer.
Copy and paste a paper of choice Into Selection.
Deselect.
Delete the template layer.
Copy and paste your tube as a new layer.
Add your embellishments. I used:
Element 19: Resize 70%
Vine 1
Butterfly 2 & 3: Resize 20%, 80% and 80% again.
Free rotate 20 degrees.
Use various elements in Element 1.
Add your copyrights.
Add your name.
Give it a slight inner bevel as before accept change the bevel to #2.
Apply some Noise to your liking.
Resize all layers 95%.
I hope you enjoyed this tutorial.
I’d love to see your results and show it off in my Show Arena.
Email me!
Hugs,
Bev
No comments:
Post a Comment