
Supplies
1 tube of choice - I used the beautiful artwork of Zindy S.D. Nielsen which you can purchase here.
Font of choice - I used LavishlyYoursROB
Weescotlass mask 249 here
Eyecandy 5: Nature - Fire
Animation Shop
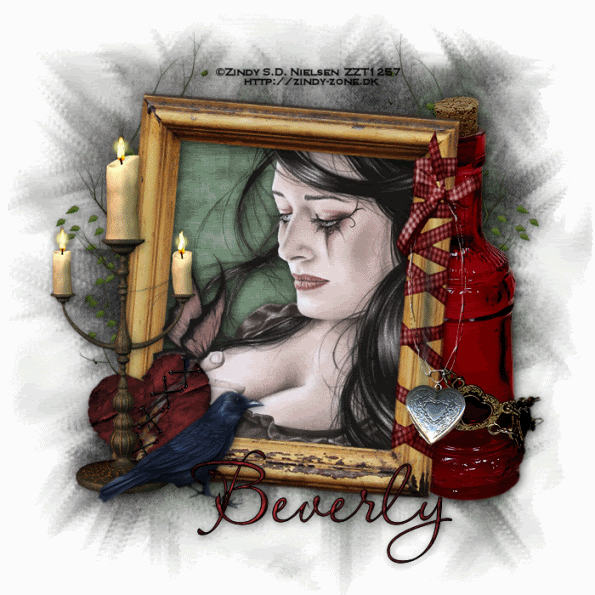
“Blood Moon Volturi” is a PTU tagger size scrap kit created by Jessica of Gothic Inspirations and can be purchased at Scraps With Attitude.
Jessica, thank you for another wicked scrap kit!
This tutorial was written assuming you have a working knowledge of PSP.
~♥~ Let’s get started ~♥~
Open up a 700 X 700 blank canvas.
Flood fill white.
Copy and Paste Frame 7 as a new layer.
Resize 70%
Free rotate right 5 degrees.
Click inside with your Magic Wand.
Selections/Modify/Expand by 6.
New Raster layer below the frame.
Copy and paste a paper of choice Into Selection.
DO NOT DESELECT
Copy and paste your tube below the frame.
Resize as needed.Selections/Invert
Tap the delete key.
Deselect.
Close out your white background and Merge Visible.
Reopen your white background and close out your merged layer.
Now we’re going to make the layer for your mask.
Highlight your white background.
New Raster layer.
Copy and paste a paper of choice Into Selection.
Deselect.
Copy and paste Moon as a new layer.
Position in the top left corner.
Copy and paste Tree 1 as a new layer.
Position near the right side of your tag - centered vertically.
Duplicate - position it near the center and lower.
Close out your white background.
Merge Visible.
Apply the mask.
Resize 120%.
Merge Group.
Reopen all layers.
Add your embellishments. I used:
Tree 3: Resize 70% Duplicate/Mirror
Bottle: Resize 75%
Heart: Resize 30. Free rotate left 20 degrees
Necklace: Resize 50%. Use Eraser tool and erase a bit to give the effect as if it’s tied into the ribbon.
Candle 2: Resize 80%
Crow: Resize 35%
Highlight the candle layer.
Duplicate twice for a total of 3 candle layers.
Rename then Candle 1, 2, and 3.
Highlight Candle 1 layer.
Using your Freehand Selection tool outline each of the flames.
Apply Eyecandy 5: Nature - Fire and use these settings:
On the Settings tab: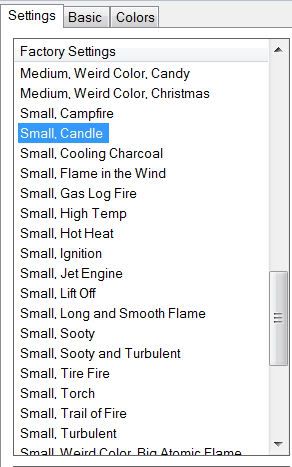
On the Basic Tab: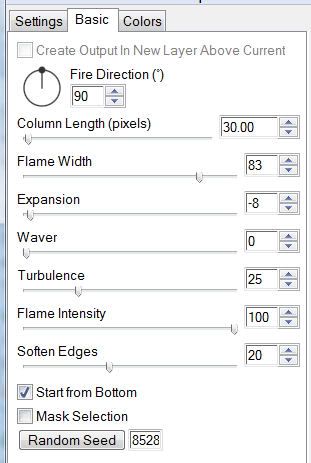
On the Colors Tab: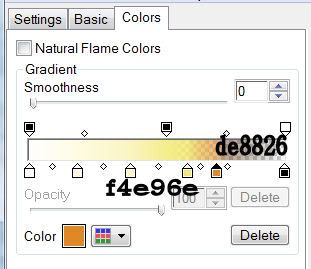
Click OK.
Highlight Candle 2 layer.
Apply the fire effect again accept hit the random seed button once.
Repeat the above step with candle 3 layer.
Close out Candle 2 and 3 layers.
Add your copyrights.
Add your name.
Give it a slight inner bevel: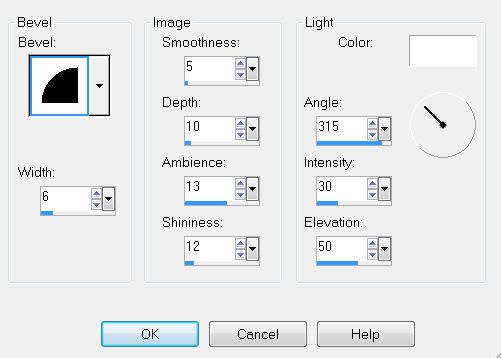
Copy Merge
~Now it’s time to Animate~
Open up Animation Shop.
Edit/Paste as New Animation.
Back into PSP.
Close out Candle 1 layer.
Open up Candle 2 layer.
Copy Merge.
Carry into AS.
Edit/Paste/After Current Frame.
Back into PSP.
Close out Candle 2 layer.
Open up Candle 3 layer.
Copy Merge.
Carry Into AS.
Edit/Paste After Current Frame.
Ctrl + A to highlight all frames.
Animation/Frame Properties
Change the number to 25.
View your animation.
If you’re happy then resize your frames.
Animation/Resize Animation.
Percentage of Original checked.
Change numbers to 85
OK
Now you can save your animation.
I hope you enjoyed this tutorial.
I’d love to see your results.
Email me!
Hugs,
Bev
No comments:
Post a Comment