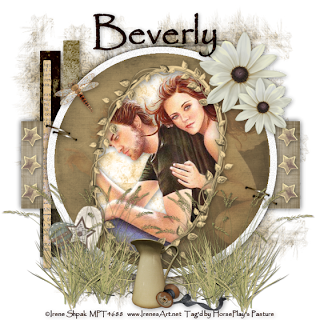
Clicking on the image will allow you to enlarge to bigger view.
Supplies
1 tube of your choice - I used the beautiful artwork of Irene Shpak at MPT
Font of Choice - I used Papyrus which came with my pc
Weescotlass Mask 297 here
Divine Intentionz Template 320 here
“Mayberry Gazette” is a PTU scrap kit created by
Brandie of Brandies Eye Candies and can be purchased at Scraps with Attitude. You can visit her blog here.
Thank you Brandie for such a truly wonderful kit. I fell in love with this!
~♥~ Let’s get started ~♥~
Open up the template.
Shift + D.
Close out the Original.
Image/Canvas Size
700 X 700
OK
Flood fill the background layer white.
Delete the top 7 layers.
Highlight Rectangle 1 layer.
Click on it with your Magic Wand.
Copy and paste Paper 4 as a new layer.
Resize 85%
Choose the darkest stripe and move into position over the template layer.
Selections/Invert
Tap the delete key.
Deselect.
Delete the template layer.
Highlight Rectangle 2 layer.
Repeat the above step using the same paper accept choose a lighter colored stripe.
Highlight Rectangle 3 layer.
Click on it with your Magic Wand.
Copy and paste Paper 1 as a new layer.
Resize 85%
Move into position over the template layer.
Selections/Invert
Tap the delete key.
Deselect.
Delete the template layer.
Highlight Raster 1 layer.
Click on it with your Magic Wand.
New Raster layer.
Copy and paste Paper 5 Into Selection.
Deselect.
Delete the template layer.
Highlight the Glittered layer.
Select All/Float/Defloat
New Raster layer.
Flood fill with the white color from Paper 4.
Adjust/Add Remove Noise/Add Noise:
Uniform and Monochrome checked
Noise: 25%
OK
Delete the template layer.
Highlight Circle layer.
Click on it with your Magic Wand.
New Raster layer.
Copy and paste Paper 8 Into Selection.
Deselect.
DO NOT DELETE THE TEMPLATE LAYER.
Copy and paste Frame 2 as a new layer.
Resize 60%
Free rotate right 15 degrees
Center the frame over the circle paper layer.
Copy and paste your tube as a new layer over the circle paper layer.
Move it into position so that the faces of the tube are within the frame.
Duplicate the tube layer and close it out for now.
Highlight the original tube layer.
Change the Properties to Multiply.
Lower the Opacity to about 34.
Highlight the Circle template layer.
Click on it with your Magic Wand.
Highlight the original tube layer.
Tap the delete key.
Deselect.
Delete the template layer.
Highlight the frame element layer.
Using your Freehand Selection Tool outline the frame.
New Raster layer below the close out duplicated tube layer.
Copy and paste Paper 7 Into Selection.
Highlight the duplicated tube layer and open it up.
Selections/Invert
Tap the delete key.
Deselect.
Add your embellishments. I used:
Star 1: Resize 25% and 50%/Duplicate 5 times for a total of 6
Flower 2: Resize 25%/Duplicate/Resize 70%
Staple: Resize 25% and 50%/Duplciate/Free rotate left 15 degrees
Dragonfly: Resize 25% and 70%
Grass: Resize 50%/Duplicate
Heart: Resize 25%/Free rotate left 30 degrees
Pitcher: Resize 25% and 80%
Spool: Resize 25% and 85%
Highlight your white background.
Select All
New Raster layer.
Copy and paste Paper 9 Into Selection.
Deselect.
Copy and paste Trellis as a new layer above the paper.
Merge down.
Apply the mask.
Merge Group.
Add your credits.
Add your name.
Resize all layers 80%.
I hope you enjoyed this tutorial.
I’d love to see your results and show it off in my gallery.
Email me!
Hugs,
Bev

No comments:
Post a Comment