

Clicking on the image will allow you to enlarge for bigger view.
Supplies
1 tube of choice - I used the artwork of Gennadiy Koufay which was purchased from CILM. I no longer know where this artist sells. If you do please email me.
Font of Choice - I used Jellyka Western Princess here and Birth of a Hero here
Gem Mask 71 here
Brush Strokes - Sprayed Strokes
“Seasons” is a massive collaboration put together by many many designers in the scrapping and tagging community to help with the devastation in New Zealand caused by the tragic earthquake. This collaboration is FTU after a donation of $10 USD to the Salavation Army of NZ is made. Please visit Taggers Together for New Zealand to read more on how these talented designers are helping with this cause and to make your donation. This portion of the collaboration was created by Artmama Made. This massive collaboration was all her idea and is responsible for pulling this massive donation together. Hats off to her! Please visit her blog here.
This tutorial was written assuming you have a working knowledge of PSP.
~♥~ Let’s get started ~♥~
Open up a 700 x 700 blank canvas.
Flood fill white,
Copy and paste Embellie 8 as a new layer.
Resize 80%
Use your Selection Tool and section off the elements at the left side of the frame:
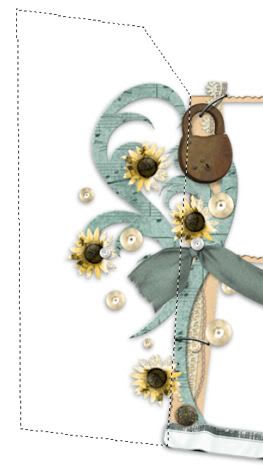
Tap the delete key.
Section off the ribbon that sticks out on the inside of the bottom frame:
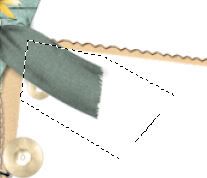
Tap the delete key.
Center the frame on your canvas.
Click inside of both frames with your Magic Wand.
Selections/Modify/Expand by 4.
New Raster layer below the frame.
Copy and paste Paper 4 Into Selection.
Deselect for now.
We’re going to add elements below the frame - don’t worry about what sticks out. We’ll take care of the mess later on.
Copy and paste Embellie 28 as a new layer.
Position at the left - see my tag for reference.
Copy and paste Embellie 13 as a new layer.
Move into position before the lighthouse.
Duplicate/Move into position behind the lighthouse.
Copy and paste Embellie 6 as a new layer.
Resize 25% and 50%
Duplicate 8 times for a total of 9.
Position between the sand layers and free rotate each anywhere from 2% - 7% either left or right.
Copy and paste Embellie 11 as a new layer.
Resize 25%
Using the font Birth of a Hero, type out “No” and “Swimming”.
Arrange them over the wood sign.
Lower the Opacity of the words to about 70.
Copy and paste Embellie 10 as a new layer.
Resize 25%
Position near the bottom of the wood sign.
Copy and paste Embellie 30 as a new layer.
Resize 70%
Move into position.
Copy and paste your tube as a new layer.
Resize very small and position behind the wood sign.
Paste your tube again.
Keep it sized large.
In your layers pallet move it just above the paper layer.
Change the Properties to Soft Light.
Highlight the paper layer.
Click anywhere outside of it with your Magic Wand.
Highlight each element layers and your large tube layer that sticks outside of the frame and tap the delete key.
Deselect.
Add the rest of your embellishments. I used:
Embellie 21: Resize 70%/Duplicate/Resize 70%/Duplicate/Resize 70%/Duplicate.
Embellie 10
Embellie 19: Resize 60%
Embellie 13
Embellie 18
Embellie 15: Resize 60%
Embellie 5
Copy and paste your tube as a new layer.
Position it to the left of the frame.
Highlight your white background.
New Raster layer.
Select All.
Copy and paste Paper 7 Into Selection.
Deselect.
Apply Brush Strokes - Sprayed Strokes:
Default Settings
OK
Apply the mask.
Merge Group.
Add your copyrights.
Add your name.
Resize all layers 80%.
I hope you enjoyed this tutorial.
I’d love to see your results and show it off in my gallery.
Email me!
Hugs,
Bev
No comments:
Post a Comment