

Supplies
1 tube of choice - I used the artwork of Dave Nestler which can now be purchased from CDO. You must have a license to use.
Font of choice - I used Dancing Script here and Clive Barker here
Jwy mask here
My Template 2 here
DSB Flux - Bright Noise
“Honeysuckle & Roses ” is a scrap kit collaboration in both tagger and full size available at TKO Scraps. This entire collaboration has 468 elements, 3 Alpha’s, and 160 Papers. Tagger size is $3. Full size is $10 or free with an $8. This is one sweet deal the store is having and I would highly recommend taking advantage of it. Each designer’s portion is gorgeous! For this tutorial I’m using the portion of Linda‘s Dream Designs. You can visit her blog here. Thank you Linda for your beautiful portion of this collab!
This tutorial was written assuming you have a working knowledge of PSP.
~♥~ Let’s get started ~♥~
Open up the template.
Shift + D.
Close out the original.
Delete the top 3 layers, Frame 2, and Square 2.
Color Pallet:
Foreground: #5c2a8a
Background: #bcb1d6
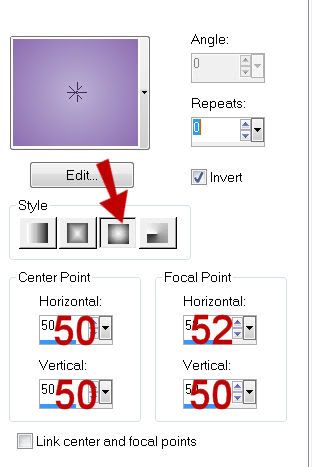
Match gradient settings to mine:
Highlight Oval template layer.
Click on it with your Magic Wand.
New Raster layer.
Flood fill with your Gradient.
Deselect.
Delete the template layer.
Give it a slight Inner Bevel:

Highlight Stitched Oval layer.
Select All/Float/Defloat
New Raster layer.
Flood fill with your background color.
Adjust/Add Remove Noise/Add Noise:
Deselect.
Delete the template layer.
Highlight Square 1 layer.
Click on it with your Magic Wand.
New Raster layer.
Flood fill with your background color.
Copy and paste your tube as a new layer.
Position over the flood fill layer.
Selections/Invert
Tap the delete key.
Deselect.
Change the Properties to Soft Light.
Highlight Frame 1 layer.
Click on it with your Magic Wand.
New Raster layer.
Flood fill with your foreground color.
Give it the same slight Inner Bevel.
Apply DSB Flux - Bright Noise:
Intensity: 25
Mix checked
OK
Deselect.
Delete the template layer.
Copy and paste your tube as a new layer.
Add your embellishments. I used:
Bouquet: Resize 85%
Color Pallet:
Foreground: Black
Background: Null
Stroke: 2
Highlight the top layer in your layers pallet.
Make your Ellipse Tool active set on Draw Ellipse.
Make an oval that’s slightly larger that the oval on your working canvas.
Tip: Make your oval and then make your Pick Tool active to get the exact size and shape you want.
Once you have the oval made:
Color Pallet:
Foregournd: Null
Background: Black
Make your Text Tool active.
Move the cursor along the center top of the oval you just made.
Once you see a Rocking A click the mouse.
A text box will appear.
Using the Dancing Script font type out the words:
Springtime is the land awakening. The March winds are the morning yawn.
Once you have it typed, don’t press apply just yet.
We’re going to make the words “appear” as if they’re perfectly spaced on your canvas…hehehe
Look at the words. The ones that are over the frame, in your text box click your mouse in the center of those words the simply hit the space bar on your keyboard until the words look as if they’re spaced perfectly.
Click on the Plus sign pf the Vector layer.
Close out New Ellipse layer.
Highlight Vector 1 layer.
Right Click
Convert to Raster layer.
Duplicate/Merge down.
Highlight your white canvas.
New Raster layer.
Select All.
Copy and paste Paper 8 Into Selection.
Deselect.
Apply the mask.
Use your Pick Tool to pull the top and bottom out slightly.
Merge Group.
Add your copyrights.
Add your name:
Resize all layers 90%
I hope you enjoyed this tutorial.
I’d love to see your results and show it off in my gallery.
Email me!
Hugs,
Bev
No comments:
Post a Comment