

Supplies
1 tube of choice and 1 image - I used the artwork of Alena Lazareva which can be purchased from Up Your Art. You must have a license to use.
Font of choice - I used Wretched here
Creative by Nature Template 103 here
Weescotlass Mask 249 here
Brush Strokes - Cross Hatch
My Supplies here - Please do not share.
This tutorial was written assuming you have a working knowledge of PSP.
~♥~ Let’s get started ~♥~
Open up the template.
Shift + D.
Close out the original.
Resize all layers 90%
Image/Canvas Size:
750 x 600
OK
New Raster layer.
Flood fill white
Send to Bottom.
Delete the top 7 layers.
Highlight 13 layer.
Click on it with your Magic Wand.
Copy and paste your image.
If you’re using the same as I did, enlarge 122%.
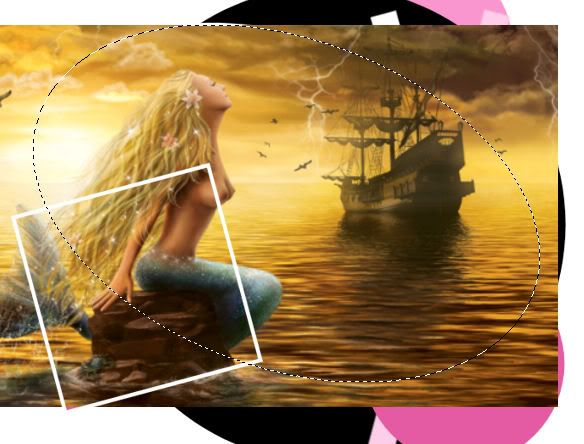
Move into position so that the image covers not only the oval but also the square below:
Once you have it moved into position: Duplicate
In your layers pallet move the duplicated layer above 8.
Highlight the original image.
Selections/Invert
Tap the delete key - You won’t see any difference on our canvas, but look in your layer pallet. You should see an oval shape of your image.
Deselect.
Delete the template layer.
Highlight 8.
Click anywhere outside of it with your Magic Wand.
Highlight the image layer above it.
Tap your delete key.
Deselect.
Delete the template layer.
Your canvas should now look like this:
Highlight 16.
Click anywhere outside of it with your Magic Wand.
Copy and paste your image as a new layer.
Move into a position you like.
Tap the delete key.
Deselect.
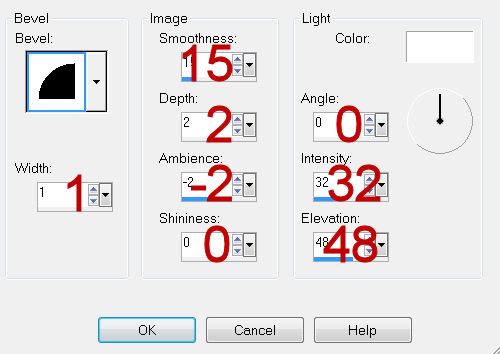
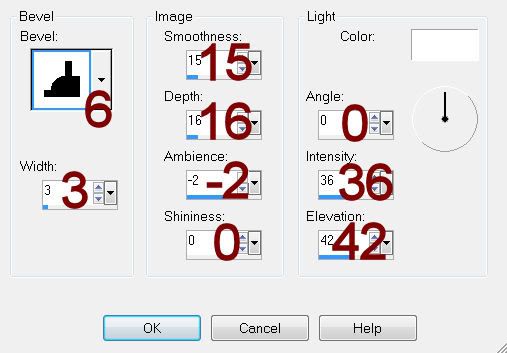
Give it a slight Inner Bevel:
Highlight 15.
Repeat the above step.
Highlight 14.
Click anywhere outside of it with your Magic Wand.
Past your image as a new layer :
If you’re suing the same image I did, resize 155%
Move into position.
Tap the delete key.
Deselect.
Duplicate/Change the Properties to Multiply.
Give this layer the same inner bevel.
Delete the template layer.
Highlight 12.
Click on it with your Magic Wand.
New Raster layer.
Flood fill with #4c1b0a
Give it a slight Inner Bevel:
Adjust/Add Remove Noise/Add Noise:
Monochrome and Gaussian checked
Noise: 30%
OK
Deselect.
Delete the template layer.
Highlight 7.
Repeat the above step.
Highlight 11.
Click on it with your Magic Wand.
New Raster layer.
Copy and paste your image Into Selection.
Give it a slight Inner Bevel:
Deselect.
Delete the template layer.
Highlight 10.
Repeat the above step.
Highlight 9.
Click anywhere outside of it with your Magic Wand.
Copy and paste your image:
If you’re using the same as I did, resize 120%
Move into a position you like.
Tap the delete key.
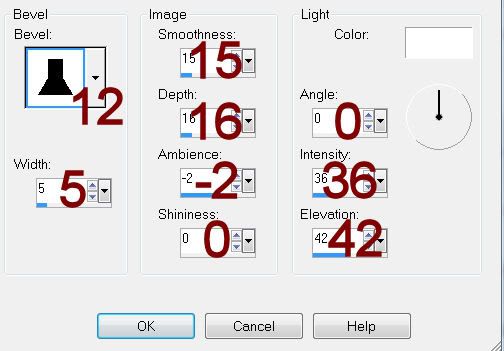
Give it an Inner Bevel:
Paste your tube as a new layer.
Tap the delete key.
Change the Properties to Multiply and lower the Opacity to about 78.
Deselect.
Delete the template layer.
Copy and paste your tube as a new layer positioning it in front of the small square.
If you’re using the same tube as I did then resize 55%
Add your embellishments. I used:
Bow: Resize 40%/Free rotate Left 20 degrees
Tree: Resize 80%/Duplicate/Mirror/Erase the bottom half of the trunk.
Highlight your white canvas.
New Raster layer.
Flood fill with a color from your tube.
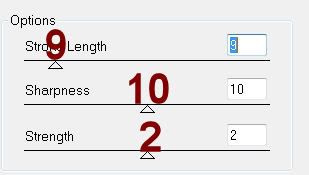
Apply Brush Strokes - Cross Hatch:
Apply the mask.
Use your Pick Tool to pull the sides out slightly.
Merge Group.
Add your copyrights.
Add your name.
Give it a slight Inner Bevel:
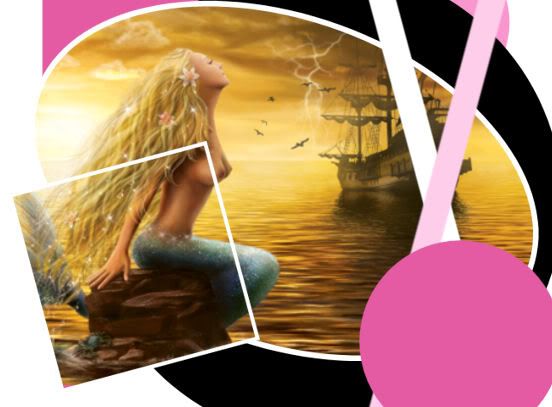
Resize all layers 70%.
I hope you enjoyed this tutorial.
I’d love to see your results and show it off in my gallery.
Email me!
Hugs,
Bev
No comments:
Post a Comment