

Supplies
1 tube of choice and 1 close up image – I used the beautiful artwork of
DiMary which is an exclusive tube from Pics for Design. You must have a license to use.
Thank you so much Tammy for this tube.
You’re a generous sweetie!
Font of choice - I used Before the Rain here
Weescotlass Mask 236 here
Toxic Desirez Template 121 here
“Steampunk Spring Time” is full size scrap kit created by Heppy of H.F.
Projekte and can be purchased from his store Inspirations of Scrap Friends. You can visit
his blog here.
Thank you Heppy for another classy and very elegant kit!
This tutorial was written assuming you have a working knowledge of PSP.
~♥~ Let’s get started ~♥~
Open up the template.
Shift + D.
Close out the original.
Delete the top 3 layers.
Image/Canvas Size:
700 x 600
OK
Highlight Pink Rectangle layer.
Click on it with your Magic Wand.
New Raster layer.
Copy and paste Paper 9 Into Selection.
Deselect.
Delete the template layer.
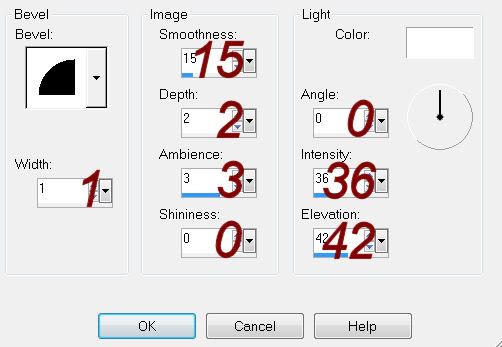
Give it a slight Inner Bevel:
Repeat the above step with Thin Black Rectangle layer.
Highlight Black Rectangle layer.
Click on it with your Magic Wand.
New Raster layer.
Copy and paste Paper 3 Into Selection.
Deselect.
Delete the template layer.
Give it the same slight Inner Bevel.
In your layers pallet:
Foreground: #fd64af
Background: #6894a4
Highlight Dotted line layer.
Make your Color Replacer Tool active.
Double Right click the mouse over the dotted line layer.
Highlight Black Circle layer.
Click on it with your Magic Wand.
New Raster layer.
Copy and paste Paper 10 Into Selection.
Deselect.
Delete the template layer.
Give it the same slight Inner Bevel.
Highlight Pink Circle layer.
Click on it with your Magic Wand.
New Raster layer.
Copy and paste Paper 7 Into Selection.
Copy and paste your close up image as a new layer.
Selections/Invert
Tap the delete key.
Change the Properties to Soft Light.
Change the Properties to Soft Light.
Deselect.
Delete the template layer.
Give the paper the same slight Inner Bevel.
Add your elements. I used:
SST6: Resize 35%/Mirror/Flip
SST3: Resize 40%
SST 21: Resize 10%
SST 17: Resize 10% and 85%
SST 22: Resize 10% and 85%
SST 24: Resize 10%
SST 16: Resize 25% and 75%
SST 8: Resize 20%
Highlight your white canvas.
New Raster layer.
Select All.
Copy and paste Paper 6 Into Selection.
Deselect.
Apply the mask.
Resize 110%
Merge Group.
Add your credits.
Add your name.
Foreground: #70531d
Background: #6894a4
Stroke: 1
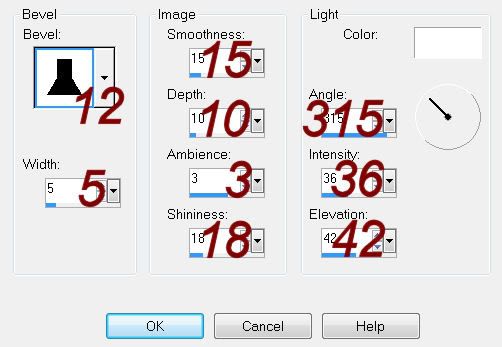
Give it a slight Inner Bevel:
Resize all layers 80%
No comments:
Post a Comment