

Supplies
1 tube of choice – I used the beautiful artwork of Lisa Victoria which
can be purchased from Up Your Art. You must have
a license to use.
Font of choice – Centeria Script here
Plug Ins used:
DSB Flux – Bright Noise
“The Sweet Honey” is a
tagger size scrap kit created by Conchi of DNScraps and can be purchased from Lollipopsn Gumdrops. You can visit her blog here.
Thank you Conchi for a truly wonderful kit.
Thank you Conchi for a truly wonderful kit.
This tutorial was written assuming you have a working knowledge of PSP.
~♥~ Let’s get started ~♥~
Open up the template.
Shift + D.
Close out the original.
Delete the top 2 layers, Rectangle 2 and Rectangle 1 layer.
Image/Canvas Size 700 x 500.
Open up the background layer.
Flood fill white.
Highlight Square Shape layer.
Click on it with your Magic Wand.
New Raster layer.
Copy and paste Paper 8 Into Selection.
Deselect.
Delete the template layer.
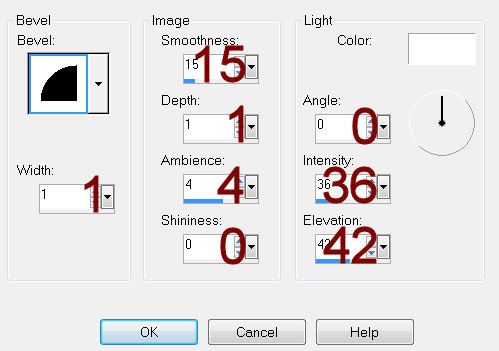
Give it a slight Inner Bevel:
Highlight Glitter Square Shape layer.
Click anywhere outside of it with your Magic Wand.
Selections/Invert
New Raster layer.
Copy and paste Paper 1 Into Selection.
Deselect.
Delete the template layer.
Give it the same slight Inner Bevel.
Apply DSB Flux – Bright Noise:
Intensity: 25
Mix checked
OK
Highlight Oval Half 2 layer.
Merge Down.
You should now have a big oval on one layer.
Click anywhere outside it with your Magic Wand.
Selections/Invert
New Raster layer.
Copy and paste Paper 12 Into Selection.
Copy and paste your tube as a new layer over the paper layer.
Change the Properties to Soft Light.
Move into position – see my tag for reference.
Selections/Invert
Tap the delete key.
Deselect.
Delete the template layer.
Give the oval paper layer the same slight Inner Bevel.
Highlight Thin Rectangle 2 layer.
Merge Down.
You should now have a very long thin rectangle on one layer.
Click anywhere outside it with your Magic Wand.
Selections/Invert
New Raster layer.
Copy and paste Paper 11 Into Selection.
Copy and paste your tube as a new layer over the paper layer.
Deselect.
Give the paper layer the same slight Inner bevel.
Highlight Circle layer.
Click on it with your Magic Wand.
New Raster layer.
Copy and paste Paper 15 Into Selection.
Copy and paste your tube as a new layer over the circle paper layer.
Lower the Opacity to about 18 – You could always just change the
Properties to Soft Light but I found it put too much of a glare on the tube.
Selections/Invert
Tap the delete key.
Deselect.
Delete the template layer.
Give the paper layer the same slight Inner Bevel.
Copy and paste your tube as a new layer.
Add your elements. I used:
Ribbon Bow 2: Resize 80%/Free
rotate Right 5 degrees/Flip
Lantern: Resize 55%
Magic: Resize 40%
Wheel: Resize 35%
Stars: Resize 60%
Highlight your white background.
New Raster layer.
Select All.
Copy and paste Paper 11 Into Selection.
Apply the mask.
Resize 130%
Merge Group.
Add your credits.
Add your name.
Color Pallet:
Foreground: #4d0f01
Background: #f6da5c
Stroke: 1.25
Type your name.
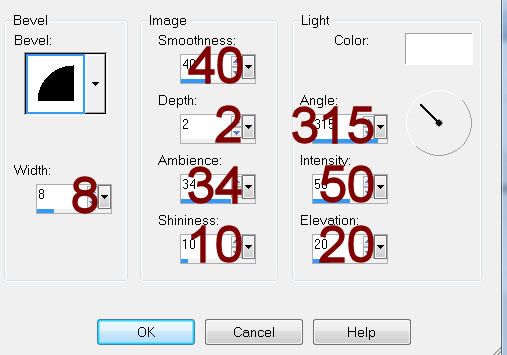
Give it a slight Inner Bevel:
Apply DSB Flux – Bright Noise:
Use same settings.
Resize all layers 80%.
No comments:
Post a Comment